The myhrtoolkit Health And Safety module includes a powerful tool for creating new custom forms to be used for data capture by an organisation. It can be used for simple menu-driven response forms, through to longer forms with a variety of input types, including free-text and file uploads.
Creating a custom form
To create a new form, give it a name and add some instructions as required. Then simply drag control sections from the menu on the right into the form builder area on the left. As you drag, a black marker will show where the control will be placed. Controls can easily be re-ordered by dragging them up and down.
To alter the control, hover over the section and a small palette of options will appear.
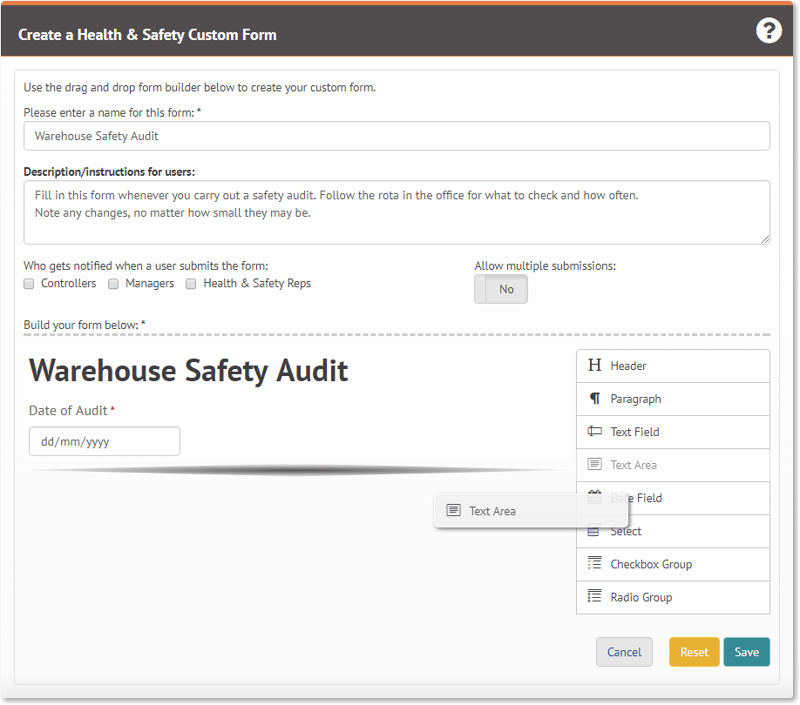
Objects available to custom forms
A reference for controls available in the Health and Safety Form Builder
 |
To see what the various form widgets available are, and what options are available, click each of the sections of the image to the left.
|
Notes on sensitive data
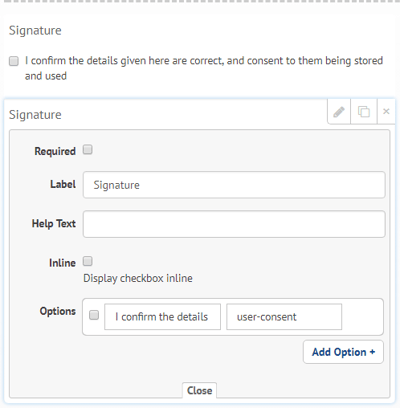
- If the data you intend to capture via a custom form is of a personal or sensitive nature, it may come under the auspices of the General Data Protection Regulation (2018). We would recommend seeking legal advice if you think this may be the case.
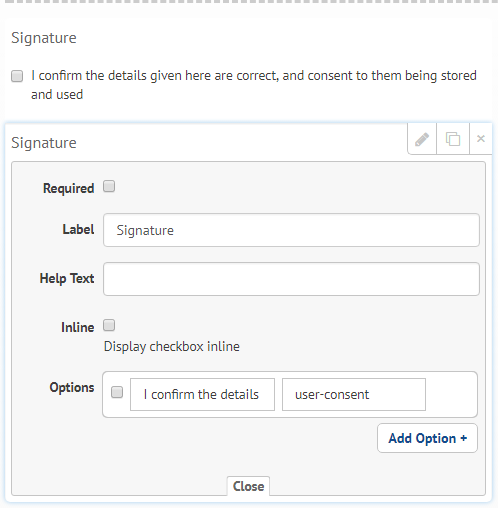
- In such cases it may be advisable to include some mechanism for the user to give permission for the data captured to be stored and used. This can be achieved by using a Checkbox Group control with a single checkbox, defaulting to unchecked. This image outlines an example of both how such a control could look to the user, and the properties to achieve it. We recommend seeking advice on final wording appropriate for your needs.
Walked through example
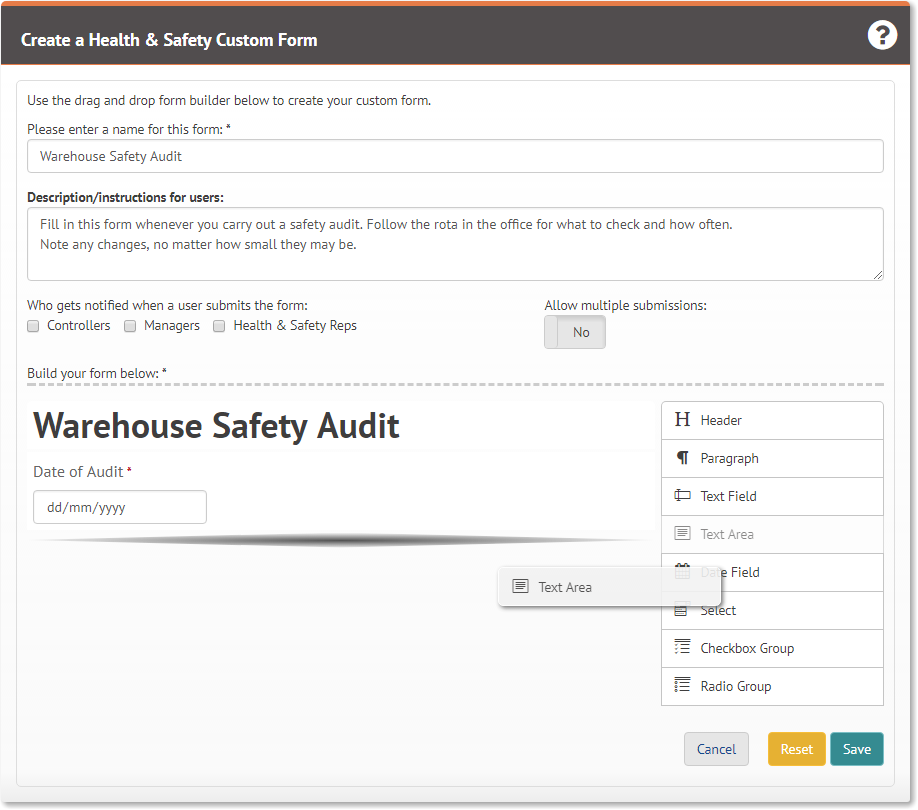
As an example of how to build a custom form, and how to then modify it, we will demonstrate the building of a form which could be used for monitoring safety in a warehouse.
To start with, some basic details about the form being created is supplied.
Related guides
Getting started with Health and safety
Health and safety - Accident book
Simple response form with checkbox
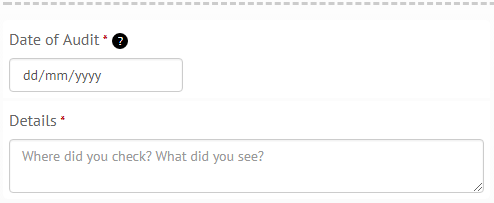
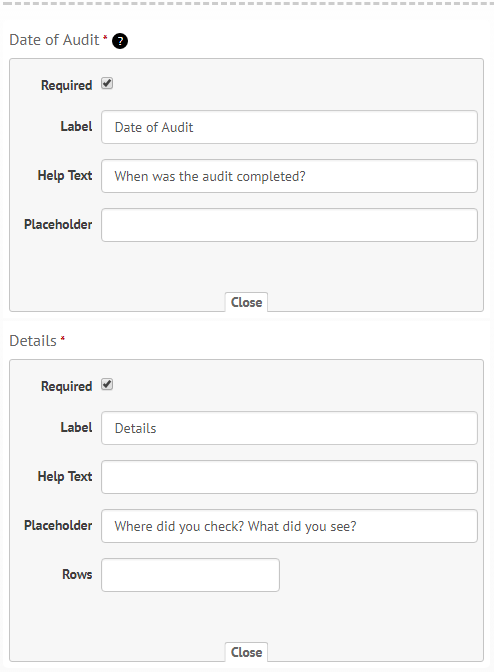
A very basic form for a Health and Safety assessment could just ask the user for a date of when the check was made and the findings. This can be achieved using a Date Field and Text Area.
This is the form in the builder, and roughly what the user would see.
And, using the edit button, these are the properties of the input controls. Notice the Placeholder setting and how it appears in the builder. When a user starts typing the hint text will disappear.
Adding a 'Select' dropdown box
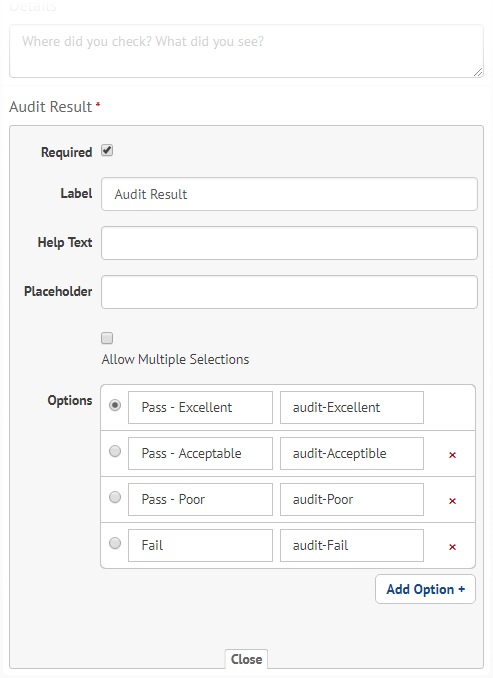
It could be that a simple binary Pass/Fail doesn’t give the granularity sought in audit results. It could be that after a failure some indication of progression is wanted, or some ability to monitor performance over time is desirable.
To achieve this, a control which can give the user a wider choice of options for a single response would be needed. One such control available is the Select control. In this new form, the Checkbox Group has been deleted and a Select control dragged on to replace it.
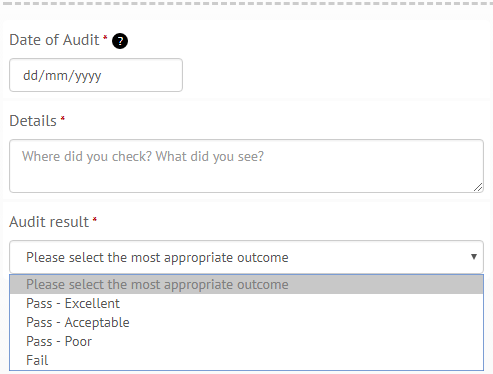
Like the Checkbox Group, a Select control has three options by default. This time a new option has been added to give a range of options for available a for ‘Pass.’ The right hand column can be filled with whatever may be meaningful to whomever is collating the form responses, in this instance it has been made quite formal, but it’s open for whatever makes sense to those who will be reading it.
Traditionally, a Select control will only allow a single response, but multiple sections are available as an option. In this case, multiple selections are not desirable, so this has not been selected here.

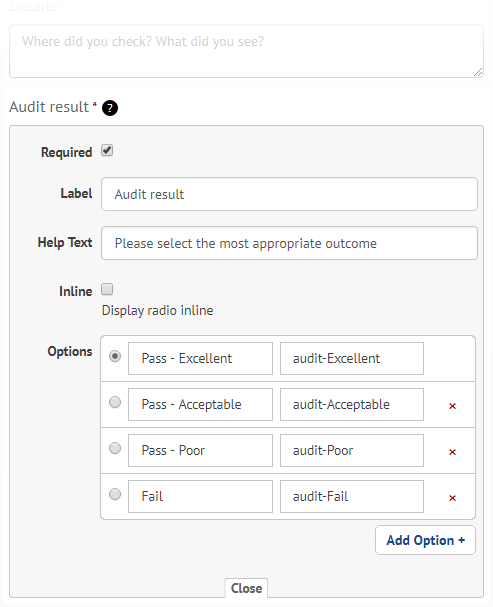
Using a 'Radio group'
An alternative to the Select control is the Radio Group. The Radio Group shows all the available responses at once. The Select control has now been replaced by a Radio Group with similar options.
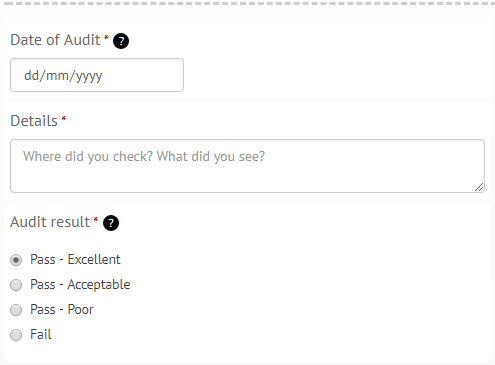
Here the Radio Group options are listed vertically, they can be horizontal (wrapping around if needed) using the Inline property. In this version of the form, the Placeholder property has been moved to the Help Text.
Longer forms and multiple sections
Whilst the form has, so far, shown how some controls can be used, it offers little complexity, granularity or scope. In the given scenario of a warehouse audit, there may be more specific answers that are desired.
Anything beyond simple data will need some thought about what is required, and how to capture it.
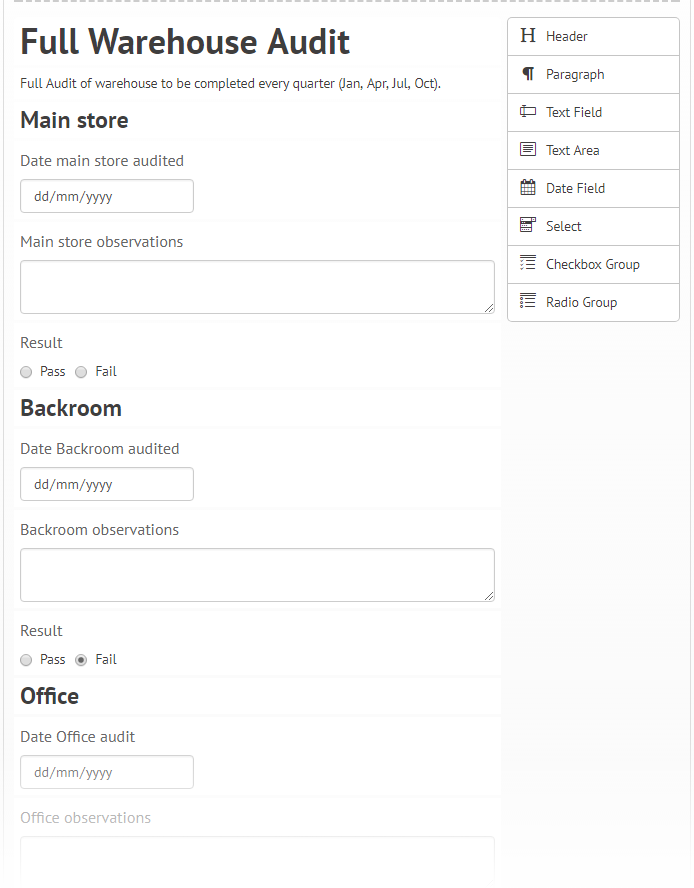
Here the warehouse has been imagined as comprising several spaces, each of which will require a separate report. With this in mind, the image below suggests a layout based on a Header using H1 and Paragraph providing an introduction, then multiple repeated structures of Header using H3 functioning as a delimiter, Date Field, Text Area, Radio Group for each of the areas.
We hope this simple walk through is helpful and will launch you on a path of easy structured data-capture for your own Health And Safety needs!

 Holiday Planner
 Absence Management
 Performance Management
 Staff Management
 Document Management
 Reporting
 Health and Safety Management
 Task Management
 Security Centre
 Self Service
 Mobile